Showing posts with label Imaginisce. Show all posts

Friday, March 1, 2013

Moxxie March Blog Hop!


Welcome to Moxxie's March Muse-A-Palooza Blog Hop!

This month we are featuring and you could win the entire "Homespun Easter" collection, which is wonderfully fresh and packed with cross stitched charm! It evokes a comforting palette in shades of cream, yellow, green and blue. This collection is absolutely perfect for your Easter and Spring themed projects.


To have a chance to win, you need to: 
  • Follow the hop through all eleven participating blogs, check out the beautiful work of the Moxxie Muses, and leave a comment for each of them. 
  • Comments will close at midnight CST on Tuesday, March 5th. 
  • Winner will be announced the next day on the Moxxie blog. 
  • International fans are welcomed to play along if they agree to pay shipping in the event of their win.
*******

Made in an evening - mini album!  Does the thought or creating a mini album intimidate you?  Sometimes it can seem like a lot of work, but it really doesn't have to be!  The Homespun Easter collection is perfect to create a cute mini album for Easter.  Want to see what I created?

Spring or Easter Mini Album

Pages Two and Three

Pages Four and Five
The photo frame is open on the top to slide in my photo.

Pages Six and Seven

Pages Eight and Nine

Page Ten or Back Cover

Details...

Page Three Details...

Page Eight Details...

The project started with this base album cut from kraft card stock:

The default size of this album allows for 4x6 photos.  It includes the base cut for each page as well.  I love that you can make this album bigger if you like or customize the page counts to your design.  The tags that were added for journaling are from K and Company tag stacks that I had in complementary colors.  I've used the Spellbinders pinking edge square dies for photo mats.  

Moxxie's papers, die cuts and stickers make putting together a mini album a very simple process.  This album was completed in an evening. I just love the sweet homespun feel of it! Now all I have to do are print out some of my favorite Easter gathering photos this year and pop them in!  

Ingredients:
Kraft Card Stock - The Paper Company
Mocha Mama PowderPuff Chalk Ink - Quick Quotes
Blue Pearls and Pearl Flourish Bling - Want2Scrap
Silver Tears, Heart and White Glam Rocks & iRock - Imaginisce
Heidi Swapp Banner (Back Cover)
Spellbinders Pinking Square Die
Felt Flowers - Petaloo
Tags - K and Company
Corrugated Frame - Jillibean Soup
Foam Squares - 3L
Other:  Seam Binding Ribbon, Twine


Thanks so much for stopping on over today!  Have a super scrappity weekend!!!
~ Rhonda

*******


Ready to hop?

Here is your hop sequence...  on your mark, get set --- GO!


*******

*******

Thursday, January 10, 2013

CHA Imaginisce Sneak Peek

Happy Thursday to you! 
 
I'm so happy to share this next project with you!  It's one of the CHA projects that I created for Imaginisce this year. 
 
If you happen to attend and see it in the booth - snap a pic and send it my way!  
 
Featuring the all new "Good Dog" collection!
 
 
This collection is packed with all kinds of color and adorable dog themed embellishments.  I know you will absolutely love it once you see it in person!!! 
 
The fish tail and diamond border dies are MFT and the flourish is CLD.
 
You can catch a peek at the Imaginisce preview post here. 
 
Have a super scrappity day!!!
~ Rhonda

Friday, December 28, 2012

Imaginisce Farewell Blog Hop

Greetings to you!  We are doing a 2012 farewell blog hop Imaginisce style!

You should be arriving at my blog from the amazing Guiseppa's blog!

I've been so very fortunate to have served two terms with this amazing company and it's now time for the new 2013 designers to take the reins. Today, I want to take a bit of time to thank Imaginisce for the opportunity to design for them and to share with you what it has meant to me to be a part of their team.

There are so many positive things to say about my experience, it's difficult to gather them all together in one post, but I will do my best to try.  : )   Imaginisce is the first manufacturer team that I was selected to design for.  My first publications were those with Imaginisce product in them, including Scrapbooks Etc., Cricut Magazine and Create Magazine.

The team spirit of Imaginisce is fabulous!  I've enjoyed every single moment being a part of their Design Team.  Cari Locken is a wonderful coordinator and leader, she consistently comes up with awesome ideas for the blog and challenges for all of the girls.

"Top Five" of Imaginisce 
  1. Imaginisce has the best tools to work with!  Those of you who follow my blog and my work will usually see the i-Rock, glam rocks and i-Top in action.
  2. The papers are amazing quality!  I always look forward to seeing the new collections!!!
  3. Innovation!  The i-Rock Tweezers, CutBright, POGO and iMagicut!  A lighted tweezers, lighted rotary cutter and a ribbon sealer tool?!!!  I don't know about you, but I can not wait to see what is next!
  4. Super fun embellishments!  Sticker Stackers and Chipboard - yes please!!!
  5. On trend!  Beautifully designed collections are always fresh and in step to current styles.

Some of my favorite 2012 Imaginisce projects:
"Love You More" Collection

"Christmas Cheer" Collection

"Bon Voyage" Collection

"Sole Sisters" Collection

"Bon Voyage" Collection and Canvas Corporation

So, my dear friends at Imaginisce, clearly...  I Dig You!
"Makin' Waves" Collection and My Little Bit of Whimsy

Please be sure to stop on over next to the amazingly talented Cari!!  

Don't forget to stop on over to the Imaginisce blog as well -- there is a giveaway each day for some lucky hopper!!!  It might just be YOU!

Congratulations and best wishes to the new 2013 Imaginisce Design Team!  We can't wait to see your creations!!!

Have a super scrappity day!
~ Rhonda

Thursday, December 6, 2012

Christmas Card Inspiration with Imaginisce!

Greetings to you!!!

This month over at Imaginisce a few of us were challenged to create a few Christmas cards.  How fun is that?!

Here are a few simple cards that you can create with your leftovers from other projects.  I don't know about you, but there are times when I'm creating a project that I cut or create extra things and then don't end up using them.  For my cards today, I used our "Christmas Cheer" collection scraps from prior projects and of course my favorite i-Rock tool.
 

This wreath sticker is layered on top of a delicate lacy die cut by Memory Box.  I used my Silhouette to cut the negative chevrons and then created a simple fishtail banner to layer it on.  A bit of extra shimmer is added with my i-Rock and a variety of pretty hot rocks and glam rocks, plus a little silver tear for the candle flame.
 

My next card features our Snag 'em stamp that I colored using my Copics, a sticker stacker and a canvas sticker accented with some more gems.  The flourish was cut with my Silhouette.  A bit of embossing on the background pattern paper gives a bit of texture.


Some details for you...

I just love using my Copic markers!!!  Our Snag 'Em stamps are so much fun!
 
Ingredients:  Christmas Cheer Collection, Reindeer Snag 'em Stamp, Canvas Sticker, Sticker Stacker, i-Rock, Hot Rocks Compact - Jewel, Glam Rocks - Silver Tears, Glam Rocks - Hot Rocks Compact - Glitter, Glam Rocks - Pearl, Swiss Dot Cardstock, Bazzill, Silhouette, d'Vine Swirls Embossing Folder, Big Shot by Sizzix, Anastasia Border Die, Cheery Lynn Designs, Floral Lace Die, Memory Box.
 
Thanks for the fun card challenge Imaginsce!  I always love to make cards!!!

Have a super scrappity day!!! 
~ Rhonda

Wednesday, November 21, 2012

Naughty or Nice? Moxxie Style!

Happy Thanksgiving eve to you! 

I've got a project to share today featuring a Moxxie line called "Party at the Pole".  The collection is very fun and spirited...  just like my boys!  Ha!

I chose these fun photos to collage from last year while making Santa's "Cookies", which was the gingerbread house.  We decorated it together and of course a lot of sampling was in order.


Catch those happy little presents!

Notice how the little Elve's hat is pointing to "naughty"... 
hmm...  cooincidence?

Ingredients:  "Party at the Pole" papers and diecuts by Moxxie.  Scalloped Grand Rectangle and Lacey Oval Grand dies by Spellbinders, Large Holly Flourish die and Doily die by Cheery Lynn Designs, Tag cut with Silhouette, iRock, Glam Rocks, Glitter Hot Rocks and Foam Tape by Imaginisce, Acrylic scallop border by Fancy Pants, Other:  Sewing Machine, Buttons, Seam Binding Ribbon and Thread.

Have a super scrappity day and a very blessed Thanksgiving!!!
~ Rhonda

Tuesday, November 20, 2012

Focus on Iron On Motifs with Imaginisce!

Tuesday greetings to you!

I just love the iron-on motifs from Imaginisce! They are so elegant in design and simple to use too! Over at Imaginisce, the designers were given a challenge to incorporate them into a card or layout this week.


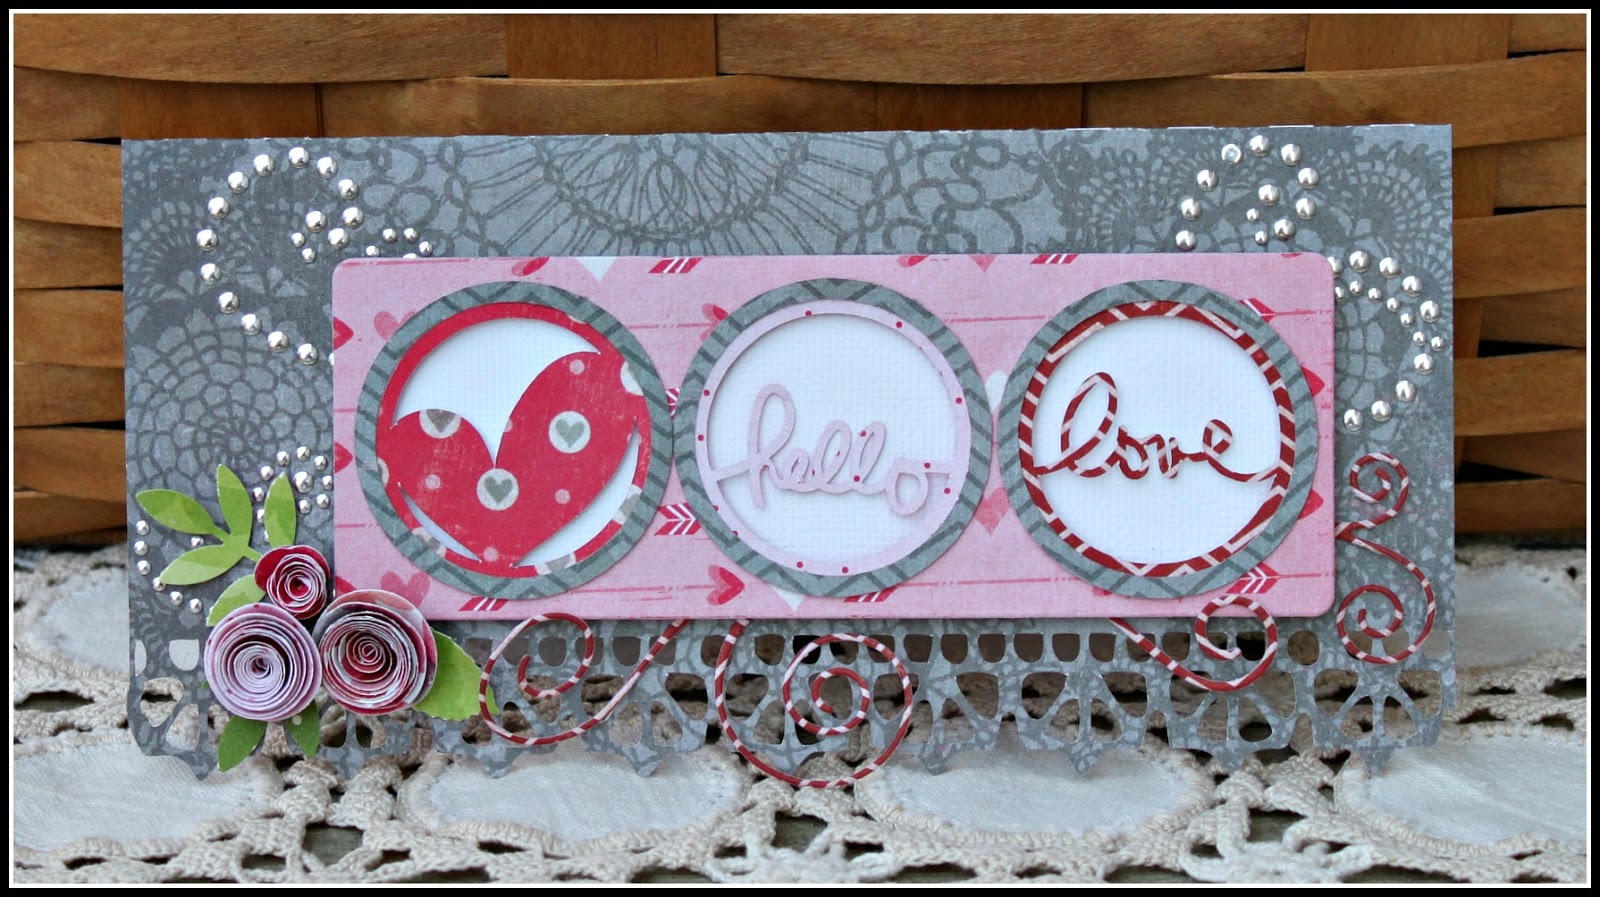
For my project, I created a pretty card.  The new 'Love You More' collection is so stunning, I just can't keep my hands off of it!  I created the card base from the dramatic grey pattern paper with my Silhouette.  

Once that was cut, I selected my motif flourish.  Using the peek-a-boo trio panel and the motif, I determined the placement for my motif and heat set the design in place using my iRock Mini Iron.


Then I cut my circle designs and sentiments using the Silhouette.  I customized another set of plain circles to then frame in my designs.  A bit of foam tape elevates the panel above the white cardstock background.  The finishing touches were a few florals, a flourish and leaves.


I hope you give the iron-on motifs a try, I know you will love them!!! Mine is called "Swirly Whirly"!

Ingredients:  Love You More collection, iRock Swirly Whirly Motif and iRock Mini Iron by Imaginisce, MFT Floral and Peek-a-Boo Trio Dies, Memory Box flourish die, Martha Stewart frond and rose leaf punches, Cardstock by AC, Silhouette

Have a super scrappity day!
~Rhonda

Saturday, November 17, 2012

iChallenge Weekend with Imaginisce!

Saturday greetings to all of my crafty friends!

The Imaginisce designers have been in creative overdrive coming up with some fabulous ideas and inspiration for you!  This weekend is our first challenge event ever...


I was so inspired by Diana's lovely sketch that I created some cards using it.  We have a birthday party to go to this afternoon so my first card features "Hello Cupcake".


Do you like the look of the negative space but feel frustrated trying to do it?

Super easy trick for you...  use your leftover sticker borders!
Using a circle punch, I then made a frame to adhere on top of my favorite paper.

Ingredients:  Hello Cupcake, iRock and Hot Rocks Compact - Jewel, Imaginisce, Spellbinders, MFT Dies, Cardstock by AC

*****

The next card was created using scraps and leftover die cuts from a previous project using the Love You More collection.  I stayed pretty close to the sketch on this card as well.

Sticker scraps below the gate, border scraps to the right...

This little sticker bird is one of my favorite embellishments!

Ingredients:  Love You More collection, iRock, Heart Glam Rocks and Hot Rocks Compact - Crystal, Imaginisce, Victorian Gate 4x4 die by Cottage Cutz, Floral die by Memory Box, Mini Doily die by MFT, Martha Stewart Border Punch, Cardstock by AC.

Be sure to check us out on Facebook too!

Thanks so much for stopping on over!  Have a super scrappity weekend!!!
~ Rhonda

Monday, November 12, 2012

Love You More Release Party!

Happy Monday to you crafty peeps!  It's a big day over at Imaginisce, we are celebrating all this week with the brand new "Love You More" release party.  

Love You More is our romantic new release that you will not be able to put down!  This collection is incredible!!!  New embellishments include washi tape, buttons and some pretty cool alpha stickers too!


"Always and Forever"

My first project is a layout that I created using one of our wedding photos.  The inspiration was the "Always and Forever" sentiment on the 4x6 card.  I had my husbands ring engraved with this sentiment so it seemed the perfect fit to use it for my title work here.  


I selected one of our wedding photos in black and white to compliment the grey tones in the collection.  The lacy border was fussy cut and layered under my photo with some additional die cuts.  I used the washi tape and layered it with some ribbon to the right of my photo.  


Tip:  To help keep thicker ribbon together when using your iMagicut ribbon cutter to make a chevron cut, use a bit of washi tape to keep your fold in place.  

Ingredients:  Love You More collection, Foam Tape, POGO, i-Rock, Glam Rocks Heart, Hot Rocks Compact - Crystal, ImagiCut by Imaginisce.  Cheery Lynn Anastasia Border Die, MFT Scallop Border die and Fishtails, Spellbinder's Grand Oval and Rectangle Scallop dies, Memory Works die, Corner Chomper by We R Memory Keepers, Jenni Bowlin Studio Tab punch and gray stick pin, Maya Road heart stick pin, Cardstock by Bazzill.  Other:  Sewing Machine, thread, seam binding ribbon.

~~~~~~~

"For You With Love" (A2 Card)

My next project is a card. I wanted to create something that can be used for a loving note of encouragement or a birthday. You see several of the stickers from the collection here. Some foam tape was used under my sentiment for dimension. A bit of thin ribbon tied simply finished the card.  

The inside of the card features one of the 3x4 journaling cards.

Ingredients:  Love You More collection, Foam Tape and POGO by Imaginisce, Doily Die by Cheery Lynn Designs, Corner Chomper by We R Memory Keepers, Cardstock by Bazzill

I hope you enjoyed my projects today!  Be sure to visit the Imaginisce blog all week long for some incredible projects featuring this stunning line!!! 

Have a super scrappity week!!!
~ Rhonda

Saturday, November 3, 2012

Lots of News from Imaginisce!!!

Greetings crafty friends!  Imaginisce has a lot of great stuff happening right now!!!

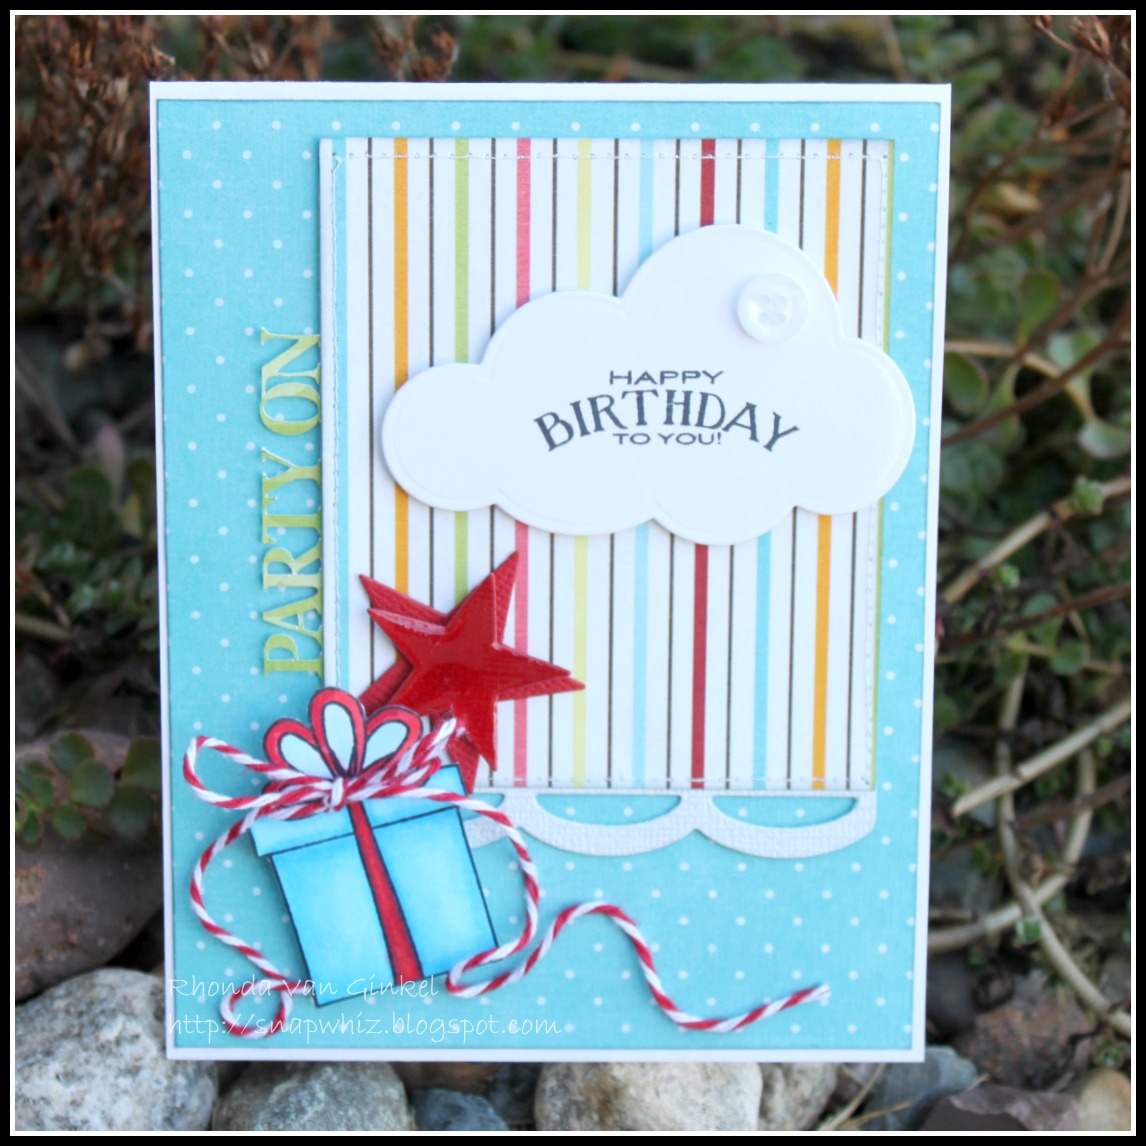
First off, the current November challenge is going on.  It's a fun challenge, mixing up a sketch, 3 pattern papers and 3 embellishments.  Here's my take on the sketch:

Happy Birthday to You! 

Details... Love that Snag' Em stamp!!!

Ingredients:  Hello Cupcake collection including Snag 'Em stamp by Imaginisce, White Cardstock by Neenah, Happy Birthday Stamp, Star, Cloud and Scallop border dies by MFT, "Party On" Sentiment cut with Silhouette, Baker's Twine by The Twinery and Ink by Memento.  Base white cardstock and red cardstock for stars by Bazzill. Scallop cardstock by Core'dinations.

So this was the perfect challenge for me to get my Copics out again.  I had a great time putting this card together.  It seems that we are always short on a birthday card around here.  I don't know about you.

I hope you play along!!!  Can't wait to see what you all create!

* * * * * * * * * *

Now for the Super BIG News you have been waiting on!!!


I have had the best experience being a part of this team!  I encourage you if you have an interest to dig on in and apply!!!  The deadline is November 30th, so go get your scrap on!!!

Oh... and check out this new Imaginisce collection...  "Love You More"!
Simply fabulous!!!

Have a super scrappity weekend!!!
~ Rhonda

Monday, October 29, 2012

Harvesting Memories with Moxxie!


Hi there crafty peeps!!!  I'm up today over at the Moxxie Blog with a project to share.  
 
Can you believe how quickly Fall has arrived?  I just absolutely love this season for so many reasons, the crisp change in the air, the beautiful colors and apples too!  I also really love the "Shades of Autumn" collection that Moxxie has. 
 
Our son just recently turned five and can now climb the wall at our gym.  I took all of these photos the day after his birthday.  When I printed out my collage of the favorites, the "Shades of Autumn" matched perfectly, and I mean...  per-fect-ly!  I loved that the season connection worked for this page as well.  Most of all, I love to take a collection and twist it just a bit.  Don't ever feel like you can't use a collection differently than its intended purpose.


I started this page build by selecting my vertical pattern paper strip.  I wanted to emulate the feel of the high climbing wall and the motion of the activity is represented by the leaves.  From there, I chose the contrasting colors and border punches that I wanted to use for texture.  I stitched those layers together and attached them down.  Next, I mixed in one of the Moxxie Die Cut sheets.  Now, the photo placement was determined and some ruler ribbon was added, followed by the ticket sticker strip.  (Say that three times fast, I dare you!!!)  I tucked in a calendar journaling circle to capture the date.
 

Then, I added my flourish die cut, pierced a few holes in between the tickets and tied some hemp and curled the ends.  The "Harvesting Memories" sticker was elevated with foam tape, then the ribbon die cuts placed underneath.  My title work was the final and fun part of this page!  I loved the "Falling" sentiment sticker.  I figured the gist of this was "Climbing Up and Falling Down".  : )  So, I played on that a bit creating my Climbing as a long vertical title.  I chose different alphas and textures to keep the page interesting.  

A final touch of my favorite bling was added for the perfect finishing touch.  I cut it apart and tucked into the design.

Ingredients:
Shades of Autumn Collection, Moxxie
Mini Diecut Stack in Fall, Moxxie
Scallop Border Punch, Fiskars
Ticket Border Punch, Jenni Bowlin
Deep Edge Double Circle Chain, Martha Stewart
Kraft Calendar Journaling Spot, Maya Road
Green Alphas, October Afternoon
Brown and Red Canvas Alphas, Prima
Magic Flourish Die by Memory Box
Fish Tail Dies by MFT
Foam Tape and Petal Roller (for Hemp curls) by Imaginisce
Gem Flourish, Zva Creative
Cardstock, AC's Autumn Collection
Other:  Sewing Machine, Thread, Buttons and Hemp

Thanks so much for spending a moment with me here today! 
Have a super scrappity day!!!
~ Rhonda

Wednesday, October 10, 2012

Share-A-Card and Imaginisce!

Happy Wednesday to you! 

I was so excited that the gals here at Imaginisce are partnering up with such a great organization like Share-A-Card!  I created two cards, one pretty clean and simple and another featuring our Snag 'em Stamps with our Christmas Cheer Collection.


I loved the elegant look of the embossed white against the red card stock, so I used it and a cute die and layered with a bit of foam tape.  I accented the "Ho Ho Ho" with a bit of bling with my iRock. 


For my next card, I used our Rudolph Snag 'Em stamp for inspiration, colored and cut him out and layered with a few other elements.  I punched a snowflake from my little folder tab die for some negative space interest and layered a white punched snowflake on top. 

I really had fun creating these cards and hope that you'll join us in supporting Share-A-Card!

Ingredients:  Christmas Cheer Papers, Chipboard and Sticker Stacker, iRock, Glam Rocks Pogo and Foam Tape by Imaginisce, Red and White Cardstock by Bazzill, Burst die by Memory Works, Fishtail die by MFT, Tab die by Lifestyle Crafts, Scallop border punches by Fiskars, Embossing plate by Spellbinders, Snowflake punches by Martha Stewart, Big Shot by Sizzix, Copics, Memento Ink, Sentiment stamp by Hero Arts, Ribbon by May Arts.

Have a super scrappity day!
~ Rhonda

Tuesday, October 2, 2012

Presenting to you... The Clicut!


Happy Tuesday to you!

I'm so excited to host over on the Imaginisce blog today and celebrate one of our newest tools with you!  I know that you're going to love the Clicut as much as we all do!!!  For my project today I used my Clicut along with our 14x14 iMat and the CutRight Acrylic Ruler.


I was inspired by the last challenge that we had to create a shaped project. My project idea was to create a large hexagon shape as the base for a Halloween sign for our front door or a layout. 


I'll show you how I created the initial step easily with card stock and then some Monster Mash paper.

Step 1:  Mark a 12x12 piece of card stock with a pencil at 6" on two opposite sides. 
Step 2:  Mark the remaining sides 3" in from each edge.  You'll have a total of 6 markings.

Step 3:  Using your CutRight Acrylic Ruler, line up the center marking with the first 3" pencil mark on the adjacent side and trim with the Clicut and the iMat under your project.

Step 4:  Continue trimming the remaining 5 cuts.
Step 5:  You are left with a hexagon shape.

I used this method to cut my second layer of the black pattern paper as well.  I started with a 10x10 piece of paper, marked at 5" on two opposite sides, then 2.5" on the remaining sides.  I used the "B" side of my paper for the bottom part of my sign layer.  The rest of the design came together effortlessly as the die cut and sticker elements in this line are so cute!  

Problem Solver:  The door I wanted to hang the sign on in our home is metal.  
Solution:  I created some Magnets using our magnet daddies and the iTop 2.0 to attach the sign to the door without having to use a door hanger.  Quick and easy!

Using the Clicut is comfortable, it fits nicely in your hand.  I also love how you are able to safely retract the blade and put it back in a safe position.  It's going to be one of your favorite new go-to tools for all of your crafting adventures!

Ingredients:  Clicut, imat 14x14, CutRight Acrylic Ruler, Monster Mash papers, Die Cuts and Canvas Stickers, iTop 2.0, 28mm (2) and 22mm (1) Magnet Daddies, iTop 28mm and 22mm punches, Pogo and Foam Tape by Imaginisce, card stock by Core'dinations, ink by Ranger.  Other:  Sewing Machine and Thread.

Thanks so much for stopping on over today!  Have a super scrappity day!!!
~ Rhonda