Showing posts with label Cricut Expression. Show all posts

Friday, August 5, 2011

Quick Quotes Challenge!

Greetings and Happy Friday to you!

Quick Quotes has a really fun new challenge up for Friday -- how cool is that?!!!  To kick off this fun, our first challenge is being hosted by Michelle Granger.  Her challenge?  Use a number somewhere on your project.  Fun!

I'll be honest, I wasn't exactly sure where the number was going to come into my project, but I did know that I wanted to play with the new Damsel In Distress papers that I had received!  Such a romantic and soft pretty collection, it was whispering to me, honest!

Here is what I created:
I used my Cricut Expression and the new Flower Shoppe cartridge for quite a few of the flowers, and a variety of my punches for others.  I also cut the flourishes with my Cricut as well.  The quote is framed with Spellbinders Labels Three. 

This is one of our wedding photos that I just love so much!  It captures that moment in time where everything just stood still and it was us, finally joining our lives together.  There is something very calming and romantic to me in this photo and I hope I did it justice.

Here are some details:
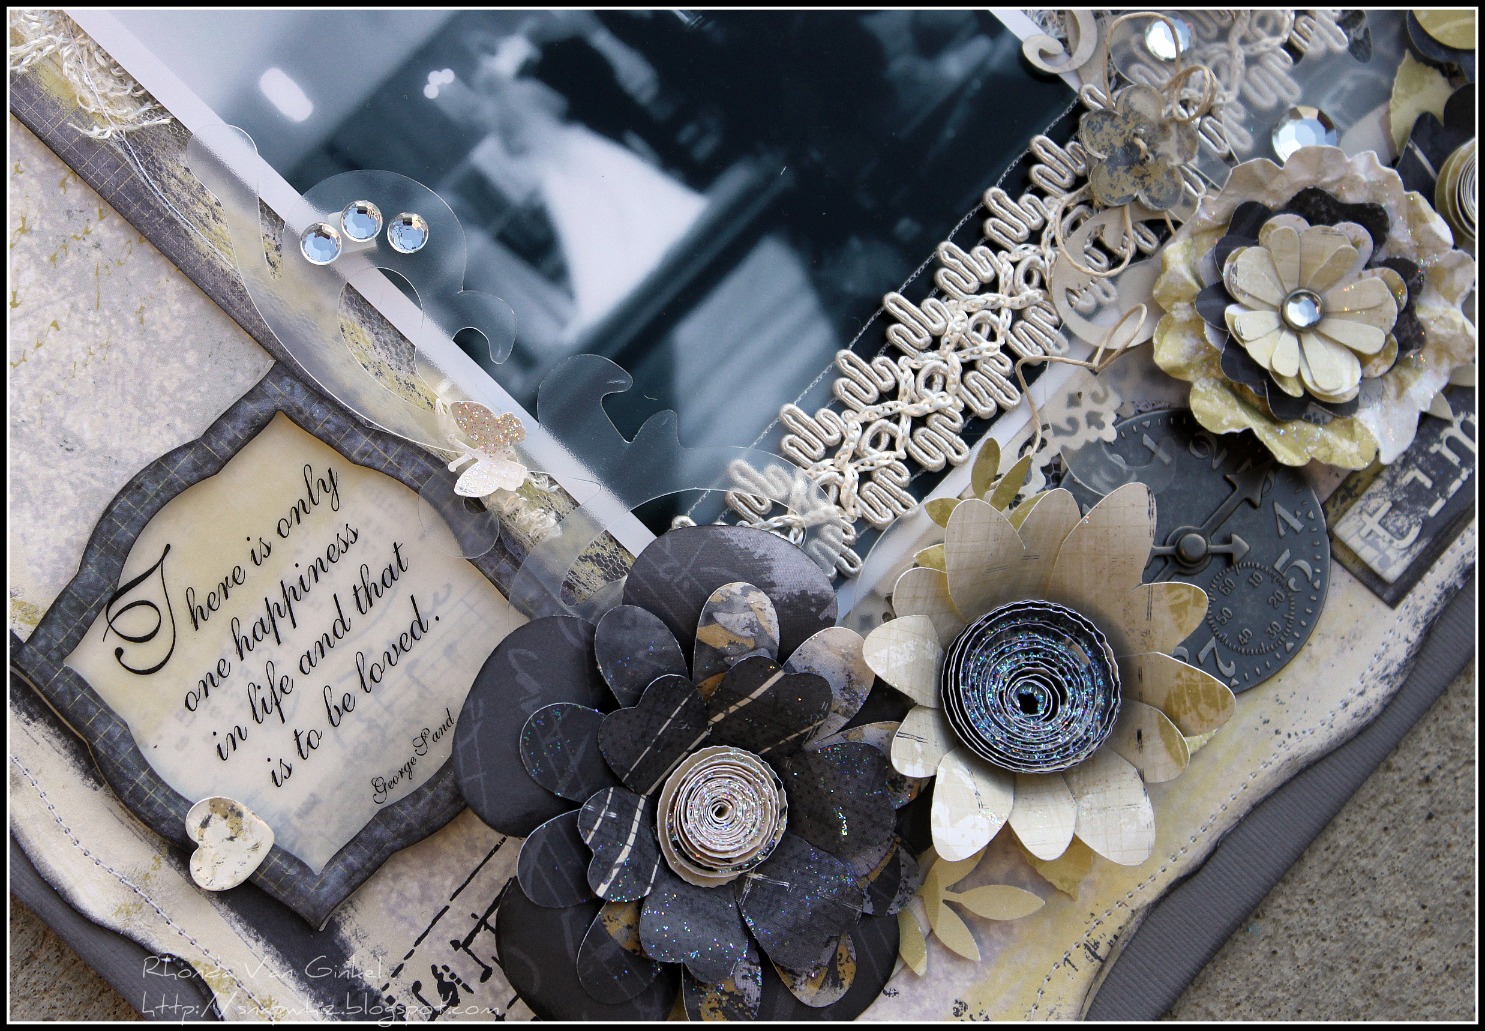
You can see that I've included more of my uber favorite Frosted Flourishes!  The trim and netting are goodies that I had in my scrappy goody bag.  The coordinating buttons and heart epoxies are made using Epiphany Crafts products. 
Here's another detail photo for you.  I've also added some Perfect Pearls in Platinum to my butterfly and to the far right flower.  Where's my number for the challenge?  On the clock face as well as I wrote our wedding date above the "Time Stands Still" sentiment block.  I used our Powder Puff Chalk Ink in Midnight Confessions very gently to ink the edges of my elements.

We can't wait to see what you do with the challenge, please make sure to stop by the Quick Quotes Blog to get all of the challenge details!  Thank you to Michelle for hosting our first challenge!

Have a super scrappity day!
~ Rhonda

Monday, July 25, 2011

Santa's Little Helper Release Party!

Happy Monday to you!  We're so excited this week to be celebrating a little "Christmas in July" at Imaginisce

Welcome to the Release Party for "Santa's Little Helper"!

I have a few projects to share with you today, let's start off with a layout that I did using our official holiday photo from 2010.  We are really hoping for a better Santa experience in 2011, which was the prompt for my journaling card.  "All Done Santa, See You Next Year!": 

I used my i-Rock and a variety of gems and of course that awesome flourish template!  These papers have the best patterns, I found it really quick to put my projects together.  On the top of the page I used some ball trim that I had in my stash. 

The journaling card is from Maya Road and the mini alpha's are from My Little Shoebox.  They were so generous to send alpha stickers to our Design Team and I have been using them all the time! 

My next project is a "Dear Santa" card that I created using my Cricut Expression and the Sentimentals Cricut cartridge to create the stamp card base.
I placed some black card stock behind the wavy lines and the sweet Santa image into the stamp cutout.  I thought this was such a cute shaped card!  Of course, I used my i-Top and a 28mm brad to embellish my gifts die-cut along with my i-Rock and assortment of gems.  You'll see my MLS min alpha's were used for the sentiment.

My final project(s) are a trio of Christmas ornaments that were created from a thrifty find.  Those are the best kind, no?  Michael's has these cute dollar chipboard albums in all kinds of shapes during the holidays.  Well I grabbed a few of the star ones because they transcend the holidays, but they really do make wonderful ornaments as well!

I used the larger Sizzix Tim Holtz accordion flower die, then a few Martha Stewart snowflake punches with some kraft cardstock.  The final stack of little punched stars finished this nicely.  Doing chipboard projects is a breeze with our d-Stress tool!  Don't you just love how it worked the edges of this ornament?  This one feels so classic to me. 

This ornament was lovingly adorned with many glam rocks using my i-Rock.  I love the metal studs, they go on so fast and really add that perfect little spark.  I started with a Martha Stewart doily tag, inked it in some Antique Linen distress ink and it matched the paper perfectly.  The accordion flower was layered on it and topped off with Santa. 


My final ornament I had some fun with my i-Top and the fun characters in the line.  Rudolph is just adorable!  I used some frosted lace stickles on my snowflakes and a few strategic gems.  I love the classic feel of these ornaments and am pretty excited to have a few already made for this year.  Our sons love to play with them, so chipboard covered ornaments are perfect for their ages.

Imaginisce Tools Used:

That's what I have to share with you for today.  I hope you enjoyed a little Christmas in July with me and be sure to stop on over to the Imaginisce Blog to see what the other Designers have created.  You'll want to be sure and leave a comment too!  They are giving away three collections to some lucky commenter's this week...  it could be YOU!

Have a super scrappity week!
~ Rhonda