I'm
so excited to share with you my first project post as part of the new Simply Renee Design Team!
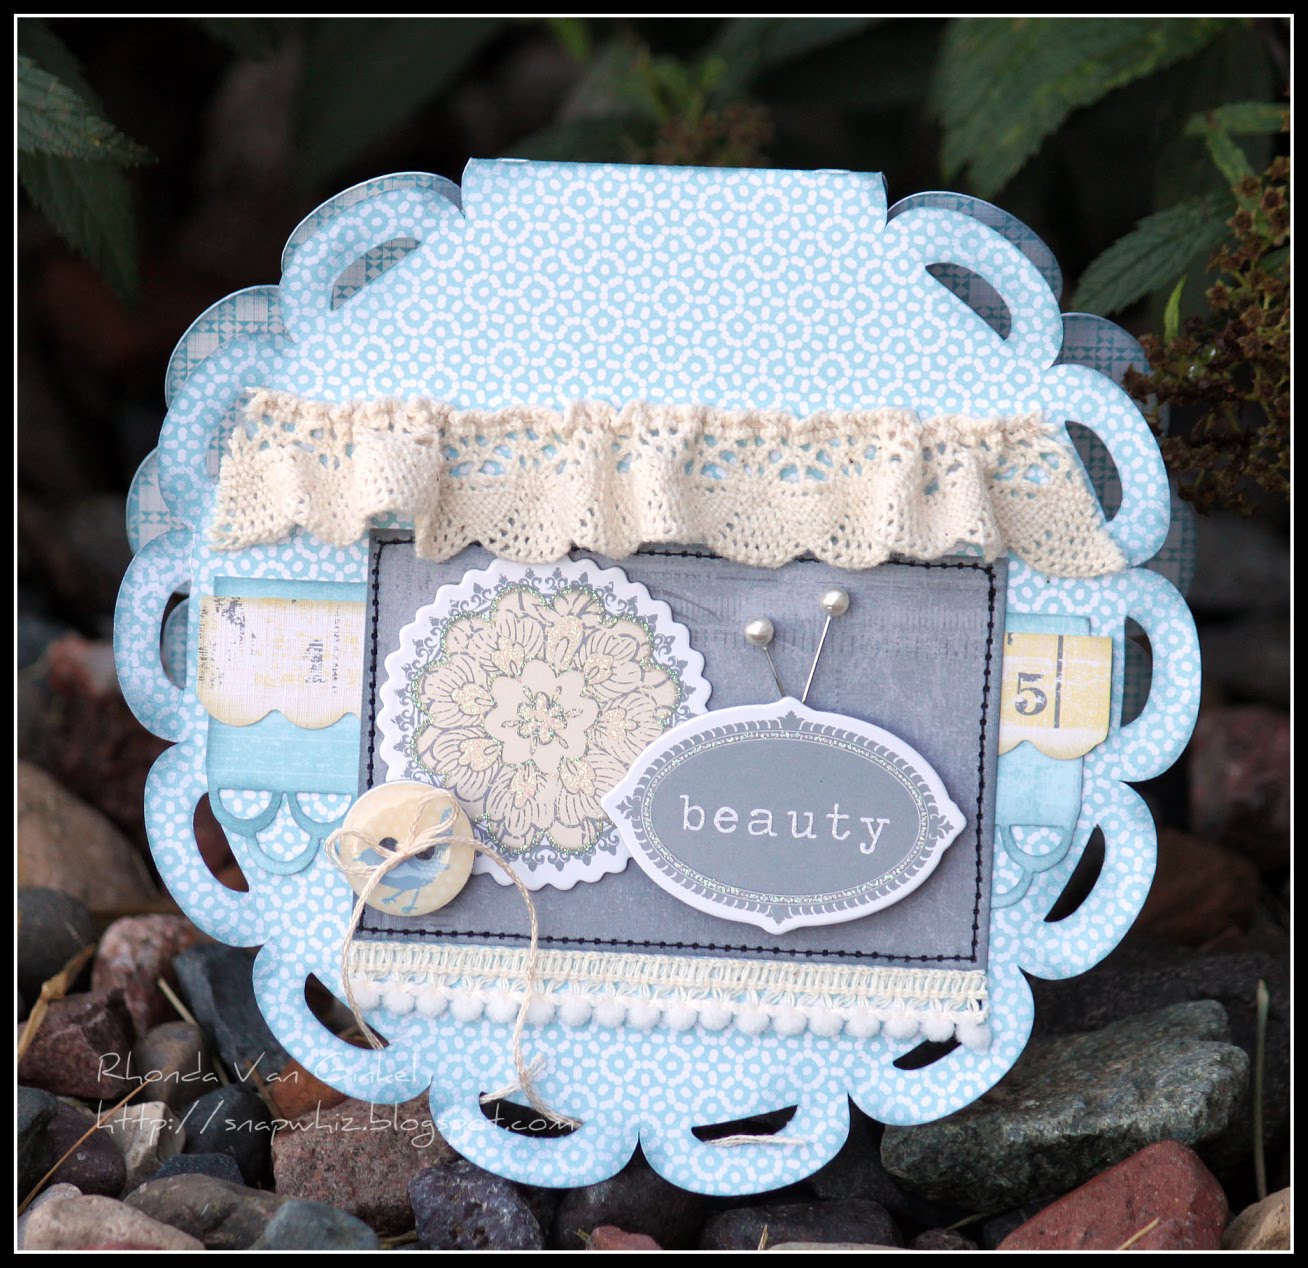
My project is all about upcycling which is very much on trend today. I finished up this chai latte mix last week and could not bear to part with this cute container! Perhaps it is the feel of nostalgia, but I just
loved how sturdy it is and overall, the cuteness factor won me over. Am I alone here?
One of my crafty commitments in 2010 is to try to journal more often and meaningfully. I decided that I wanted to alter my little container to become a new 'home' for my journaling pens. I really need to have my pens organized in a single place of honor in my studio.
Here is my 'before' photo so you can see where I started:
Here is what it looks like now... Penny for Your Thoughts...

I couldn't resist the sentiment and decided that this project 'needed' a wheat penny. I added just a smudge of liquid pearls to it to soften which created just the feel that I wanted. You will notice that I didn't just stop with the container! I had to create just a little more eye candy for my desk.
Here are the extra details including the fun little hat that I made by flipping over that little lid:
To create the ruffled paper ribbon on the botton, I set my sewing machine stitch length to long and stitched in the middle of the double scallop punched trim. I then got the paper slightly damp and gathered it to create paper "ribbon". To disguise my stitching I applied some trim over the top.
Here are my little creations in action at my desk next to my Clip-It-Up Mini. I just love how perfectly the Mini works for storing my bling and embellishment collections. It's just the perfect size to help organize your array of embellishment goodies.
I hope that you take a look at some of the things that you recycle from time to time and see how you can re-purpose or upcycle to help you organize your craft space. Please share your fun projects, I would love to see them!
Ingredients:
My Mind's Eye, 'So Sophie' *
Zva Creative Pearls *
Prima Say it In Crystals
Kaiser Pearls
Cricut Expression and Summer In Paris cartridge * for 3D dress form
Martha Stewart butterfly punches and scallop punch
Spellbinders Labels Ten * and Shapeabilities Fleur De Lis
Paper Flower *
Dried flowers, thread, trims, feathers and velvet flower from stash.
* These items from Thoughts 2 Paper
Thank you
so much for stopping on over today, have a super fabulous rest of your day!