Friday, December 30, 2011

Kanban Creations to Share!

Happy Friday!!!  Are there any sweeter words?  I'm sure vacation comes to mind if you are fortunate to be on it right now!  This time of year is so much fun with the extra days off here and there and all of the festivities, isn't it?

Today I have a few fun creations to share that I made with my Kanban Crafts products.

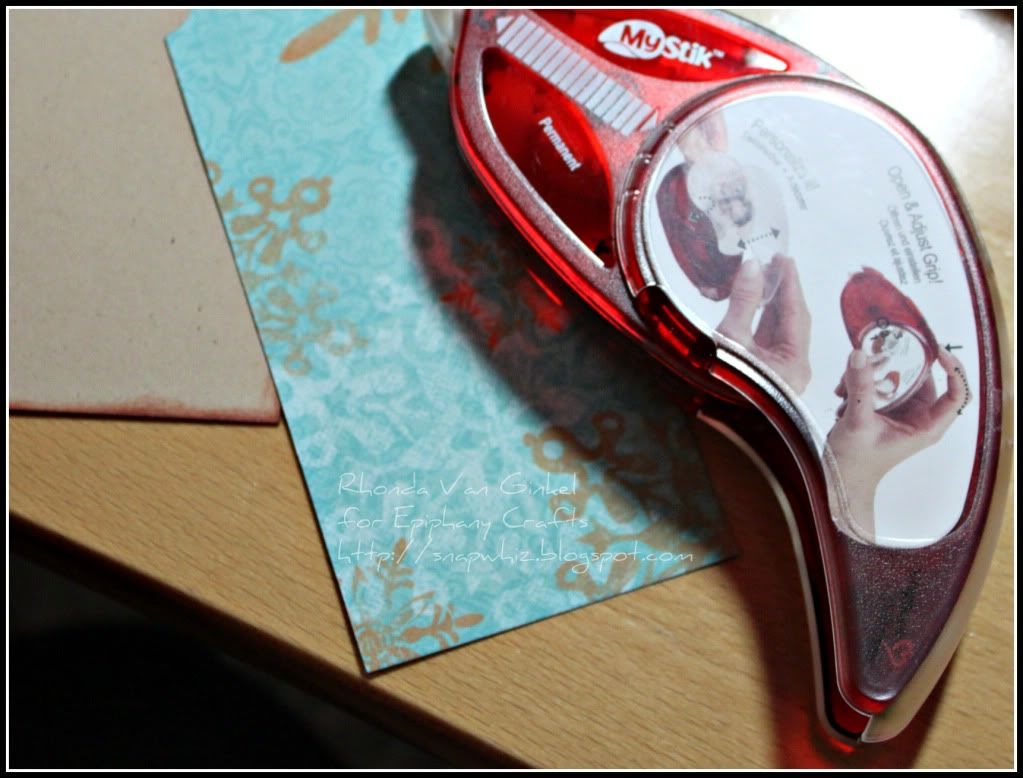
First up, is Percy the penguin.  He is a wobbler and was so much fun to create!!!  I cut a section of his hat and slipped his hair through.  I also added some i-rock gems to bring the design to life a bit.
Isn't he fun?  My kids love to rock him and see him wobble and move!!!
The irony of this card is that here in Minnesota, we currently have NO snow!  I can hardly believe we are heading into 2012 with no snow on the ground!!!

It's always fun to mix things up so of course I had to create a pretty card as well!
I added some extra trims, adhered my die cut shapes and sentiment block with foam tape for a little dimension.  A simple string bow added a lot of interest for the sentiment block. 

"Let it Snow - Wobbler" - Ingredients:
Percy - Product ID: PCT9452
Silver Pearl Cardstock - A4PRL240FSI
i-Rock tool and gems, foam tape, Imaginisce
Other:  Seam binding ribbon

"Thinking of You" - Ingredients:
English Riviera - Roses - Green; Product ID: CRD1121
English Riviera - Mini Card - Green, Product ID PCT1198
English Riviera - Green; Product ID: SCR9026
Pink Pearl Cardstock - A4PRL240PI
i-Rock tool and gems, foam tape, Imaginisce
Mini Rose trim and heart stick pins, Maya Road
Spellbinders Labels 13
Spellbinders Grand Calibur
Other:  String

Thank you so much for stopping on over today!!!  Have yourself a super scrappity day!
~ Rhonda

Thursday, December 29, 2011

New Years Inspiration!

Happy Thursday to my crafty friends!  Two more sleeps until 2012, are you ready?

Imaginisce challenged us to come up with something inspirational for New Years.  I thought about it for a bit and this is what I came up with:
For this project I used our Bon Voyage collection for its rich tones and elegant feel. The black flourish of i-rock gems and the i-top covered in ribbon and tulle give a bit of movement and texture.
To commemorate 2012, I stamped the year using my A. Jillian Vance Design stamps and used Versamark and white embossing powder to keep the design subtle.
A few additional black gems were added into the black rose trim.

Supplies:
"Postcard from Afar", "Stateroom Baggage", Bon Voyage Pattern Paper - Imaginisce,
22mm Brad Daddy - Imaginisce,
22mm Brad Daddy Punch - Imaginisce,
i-Top 2.0 - Imaginisce,
i-Rock - Imaginisce,
i-Rock Small Flourishes Stencil - Imaginisce,
i-Rock Hot Rocks Compact - Multi - Imaginisce,
i-Rock Hot Rocks Compact - Crystal - Imaginisce,
Stamps - A. Jillian Vance Design,
White Embossing Powder - Ranger,
Versamark,
Cardstock - Bazzil,
Card Die - AccuCut,
Black Velvet Trim - Bella Blvd.,
Black Rose Trim - American Crafts,
Glue Glider Pro - Glue Arts,
Glossy Accents - Ranger,
Other: Black Tulle, Wide black Grossgrain Ribbon, Embossing Heat Gun

Thank you so much for stopping on over today!!!  Be sure to visit the Imaginisce Blog for more New Years Inspiration!  Have a super scrappity day!

~ Rhonda

Wednesday, December 28, 2011

A Special Ornament!

Wednesday crafty greetings to you!

I’m excited to bring to you a fun little project today that I created with my December Quick Quotes Club Q kit.

I thought it would be fun to mix up my projects a bit and create an ornament for the tree! Every year I create a few ornaments that are special to me for our tree. This is my Quick Quotes ornament for 2011 featuring my two sweet little guys. : )
To create this ornament I used the Tim Holtz Accordion Flower die by Sizzix. I created two and sandwiched them together. The cute little gingerbread men are stamps by A. Jillian Vance Design and represent my kids. I colored them with my Copics.
 
I added a layer on either side of a punched snowflake. Using my Epiphany Crafts Round 25 Bubble Caps and Metal Charms were a perfect accent and provided a wonderful way to hang the ornament!

I punched holes through the center of the snowflakes so my hanger ribbon could be threaded.
Here is the flip side. I just love that sweet gingerbread man! A little Diamond Stickles on top of my snowflake and voila~!

A sandwich view.

Ingredients:
December Club Q Kit– Quick Quotes
PowderPuff Chalk Ink; “Bloody Mary” – Quick Quotes
Accordian Flower Die – Tim Holtz for Sizzix
Snowflake Punches – Martha Stewart
Bubble Caps Round 25 (2) - Epiphany Crafts
Round Metal Charm 25 (2) – Epiphany Crafts
Shape Studio Tool Round 25 – Epiphany Crafts
Stamps; "Christmas Baking Treats" – A. Jillian Vance Design
Copic Markers
Diamond Stickles - Ranger
Beacon’s 3 in 1 – Quick Quotes
Grand Calibur – Spellbinders
Other: Ribbon

Thanks for spending a moment with me here today!  Have yourself a super scrappity day as we get ready to ring in 2012!!!

~ Rhonda

Friday, December 23, 2011

Christmas Inspiration!

Hello there and Friday Christmas Eve eve greetings to you! 

Do you ever get inspired by a photo, but aren't really quite sure how you might use it?  Well, that's what happened to me with this project that was created for Imaginisce
This started out as a photo frame from an old clock kit that I found on clearance at Tuesday Morning for 9 dollars.  It had a clock and 2 coordinating frames in it.  This is the only frame that I have left.  When I removed the chipboard topper, it became a shadowbox and my idea was born!

A photo to show dimension:
The full list of ingredients can be found over at Imaginisce.  You'll want to be sure you stop over and leave a comment for your chance at a fabulous prize package!!!

Thanks so much for stopping on over today!  Have yourself a super scrappity day!!!
~ Rhonda

Wednesday, December 21, 2011

Quick Quotes - Verry Merry Indeed!

Happy Wednesday to you!!!  I have a fun Quick Quotes card to share with you today.

I am so excited to share with you a creation using our latest new line “Very Merry” from the December Club Q Kit! The line has gorgeous colors and wonderful holiday design elements.

I was so inspired by one of our top 3 challenge winners, Anniebee and her pretty wreath that I thought it would be perfect with one of the circle embellishments from the kit!
Some details for you:
Techniques Used:
  • I used the red circle embellishment as the basis for my wreath.
  • Using a couple of snowflake punches, I attached them on the top and the bottom of the circle with some 3-in-1 glue.
  • Attached some pearls included in the kit, then a few other coordinating gems.
  • Stamped my sentiment using our Midnight Confessions PowderPuff Chalking Ink.
Ingredients:
December Club Q Kit (Paper, Ribbon, Embellishments)
PowderPuff Chalk Inks: Amaretto, Midnight Confessions and Blue Hawaiian
3 in 1 Glue, Beacon’s – Quick Quotes
Blue Cardstock - Bazzill
Snowflake Punches – Martha Stewart
I-Rock, I-Rock Glam Rocks – Imaginisce
Corner Chomper – We R Memory Keepers
Tiny Attacher – Tim Holtz by Ranger
Sentiment Stamp – American Crafts
Sentiment Die - Spellbinders
Foam Tape – Imaginisce
Grand Calibur - Spellbinders
Other: Sewing Machine and Thread
Have a super scrappity day!  Are you all done shopping and wrapping? 
~ Rhonda

Monday, December 19, 2011

Holiday Blog Hop with Imaginisce and ClearSnap!

Happy Monday to all my crafty friends!  I have something fun to share with you today.

 
Imaginisce has a fun little blog hop this week with our friends over at ClearSnap.  We are bringing you all a bit of holiday inspiration and of course, the opportunity to win a fun prize or two!

Here is my little card that I created with a gift card holder:
Here are some details for you of the Sparkle Fibers, aren't they cute?:
I used the Imaginisce POGO to adhere my snowflake and our foam tape to attach the chipboard sentiment.

Supplies: Imaginisce (Santa's Little Helper, Foam tape, POGO adhesive),
The Paper Company - Kraft cardstock; Maya Road (Kraft envelope);
Dress it Up (Crystal snowflake); Stampin ' Up (Tab punch);
Clearsnap (Glue Gloss, Sparkle Fibers, Popcorn ink,
Deep Lagoon Ink, Chesnut Roan ink, Cranberry ink);
Other: trim, sewing machine and thread

Thank you so much for stopping on over today!  Have a super scrappity day!!!

~ Rhonda

Friday, December 16, 2011

Exciting Announcement To Share!

I am delighted to share with you that I've been invited to be a part of the...

To commemorate the occasion, I created a special little ornament for my tree this year:

A few details for you:
This past year has been an amazing experience designing for Imaginisce and being a part of their talented creative team.  It's a real pleasure to work with a company that creates fantastic tools and innovative products that are also affordable and easy to use.   

I want to take a moment to extend a huge thank you to Imaginisce and each and every one of the 2011 Design Team gals for their friendship and support this past year.  You've been a fabulous company and team to be a part of!  

To all of the new Design Team members for 2012, Congratulations!  I can't wait to work with you and get to know you all!!!

Have a super scrappity day!
~ Rhonda

Wednesday, December 14, 2011

Epiphany Crafts - Happy Holidays!

It's a celebration of the season over at Epiphany this month!  We are so excited to feature our Shape Studio Star 25 Tool this week!
If you look closely, you will see that I used some snowflake stamps on top part of my box, then embossed with some crystal sparkling embossing powder.  I also did this to my tag on the blue pattern paper.
The papers that I chose from Quick Quotes have this beautiful spark of light in the pattern which worked in harmony with the star shapes.  The sentiment stamp set from A. Jillian Vance Design was the perfect compliment to the design!  They coordinate with the Epiphany Round 25 Bubble Caps.  I am going to tell you right now, these stamps are addicting in a very fun way!!!

To create the box, here are the instructions that I followed.
I started with a 9x9" square piece of pattern paper.  I used my border punch to add a pretty star themed border.  To align my pattern I punched the middle piece as shown below, then used it as a template on my side flaps to trace in pencil the pattern to punch.  It worked perfectly!
Using the Super Crafty Tape by Scrapbook Adhesives, secured the box edges together:   This tape is absolutely perfect for projects just like this!!!
I used the "My Stick" adhesive to create my tag!  I love how you can pivot the angle of this adhesive to work perfectly for your hand!!!

Supply List:
"Very Merry" papers, Bling, Quick Quotes December Club Q Kit
Kraft Cardstock, The Paper Company
Blue Cardstock, Bazzill
Snowflake Punch, Martha Stewart
Snowflake Dies, Spellbinders
Snowflake and Sentiment Stamps, A. Jillian Vance
Christmas Baking Treats Stamps, A. Jillian Vance
Star Border Punch, Martha Stewart
Epiphany Crafts Shape Studio Tool Star 25
Epiphany Crafts Star 25 Bubble Caps (4)
Epiphany Crafts Shape Studio Tool Round 25
Epiphany Crafts Round 25 Bubble Cap (1)
Snowflake Rubon with Bling, Basic Grey
Bakers Twine, Martha Stewart
Score Board, Martha Stewart
Foam Adhesive and My Stick, Scrapbook Adhesives
Crafty Power Tape, Scrapbook Adhesives
Stamping Ink: Versamark, Memento
Edging Inks: PowderPuff Chalk Inks, Quick Quotes
Copics
Other: Seam Binding Crinkle Ribbon, Stripe Blue Ribbon, Crystal Embossing Powder

Thank you so much for stopping on over to spend a moment with me today!  Be sure to stop on over to the Epiphany Blog to see more amazing inspiration from the other designers!!!  There is also an opportunity to win an amazing prize package too!

Have a super scrappity day!
~ Rhonda

Tuesday, December 13, 2011

Hippity Hop!!! It's a New Release!

Tuesday greetings to you!  Is the reality of winter setting in kind of a bummer to you as it is for me?  Do you need a bit of a "pick me up" to your day?
 
Check out the Imaginisce Blog because baby it is hopping SPRINGTIME all over!!! It is our big release party for the spring line, Hippity Hop! We hope to inspire you all week and of course give you a chance to win your own HIPPITY HOP COLLECTION!  Be sure to follow along all week long!

Today I have a couple of fun and cheerful Hippity Hop projects to share with you!  First up, "Spring Time Pajamas" layout:
A few details for you:
I added some stitching on the page and layered one of our "Gotta Have It" sheer pink flowers under the die cut for some pretty texture.  I love to use Pink on my boys pages!!!  Of course, I also love to add a bit of bling with my i-Rock tool as well.  I used it for my bird's eye and on the floral die cut.
I added a hand stitched circle to the page and altered my stitch colors orange and yellow, every other one.  A touch of my Copic marker to my clear i-Rock bling custom coordinated my gem to the green script titlework.
 
My next project was just such a happy discovery!  I purchased some treats from a school fundraiser and the packaging was so cute, I thought, well let's take it apart and see how it's done!  I'm sure someone, somewhere has made these too, but this was new to me.
A side view with a bit of detail for you:
(If you'd like to make your own treat box, I scanned my template and you can get it here.)

Here's how it started out for me:
I traced the deconstructed template on top of my paper.  Trimmed the paper to size, then used my craft knife to cut out the "kite" shapes from the back side of my pattern paper.
Following the example of my inspiration, score the kite shapes on point as shown all the way top to bottom.
Turn the template and score the two lines on point as shown at the center point of the kite shape.

Fold all the horizontal lines to achieve your containers shape.  Ink edges if desired.  Use a strong adhesive tape to adhere the quarter lip after aligning to the opposite side.  Now you can gently push the ends in toward the middle and you will see your shape appear nicely.
I used some pretty seam binding crinkle ribbon to tie mine.  Aren't those die cuts the cutest?!!! 

If you create some of these fun treatboxes I would love to see them!  Please link them up.

Thanks so much for hopping on by today!  I hope you enjoyed my projects.  If you love this line as much as I do, you definitely want to stop on by the Imaginisce Blog to leave a comment for your chance to win one!!!

Have a super scrappity day!
~ Rhonda

Sunday, December 11, 2011

Giveaway Alert!

Happy Sunday!

I just wanted to share a little giveaway with you today.  Imaginisce is part of a the 12 days of Holiday giving with Scrapbook and Cards Today Magazine.


Would you like a chance to win one of these fun prize packages that includes our all new i-Top 2.0 tool?

Be sure you stop on over to visit for your chance!  You will LOVE this tool, I absolutely love mine!

Thanks for stopping on over!  Have a super scrappity weekend!!!
~ Rhonda

Saturday, December 10, 2011

Quick Quotes December Club Q!

Saturday greetings to you!

Have you checked out the new Quick Quotes Club Q kits for December?  They feature the all new line "Very Merry"!  These papers are just perfect for capturing those holiday memories or creating striking cards or tags.

I chose to get a little jump start on my Christmas tags for my projects today.  I think it's fun to have a few "extra special" tags to spruce up those gifts that you spend a lot of time selecting!  I used an existing tag that I had to copy the size/shape.
Techniques Used:
I cut Santa out from the papers and pieced a "chimney" for him to peek out of.  I loved how his finger was pointing so I figured the tag needed to say "No Peeking".  he he!  I added a little flower soft along the top of the chimney and some glitter to the flourishes.  All pieces were inked with our PowderPuff Chalk Inks.
Here is my second simple tag, "Tis the Season".
Techniques Used:
I used my stub corner chomper for the corners.  The red layer has a star relief punched out from another project, then I layered a snowflake on top of it.  I stapled my sheer ribbon for some interest.  A few acrylic snowflakes added extra texture and interest.  This was a really quick tag but still very fun.  The bells?  Those were a clearance find from the wedding section at my local Michael's. 
Ingredients:
December Club Q Kit:  Very Merry papers and ribbon by Quick Quotes
PowderPuff Chalk inks by Quick Quotes:  Blue Hawaain, Amaretto and Bloody Mary
Kraft Cardstock by The Paper Company
Snowflake Punch by Martha Stewart
Deco Corner Chomper by We R Memory Keepers
Tiny Attacher, Tim Holtz by Ranger
Heart 14 Shape Studio Tool by Epiphany Crafts
Heart 14 Epoxy Shape by Epiphany Crafts
Other:  Acrylic Snowflakes, Bells, Seam Binding Ribbon

Thanks so much for spending a moment with me here today!  Have a super day!!!
~ Rhonda

Thursday, December 8, 2011

Vintage Vibe!

Happy Thursday to you!

I shared one of my Kanban Crafts creations with you yesterday and today I have another.  If you haven't experienced their quality papers yet, you definitely are missing out!! 

This elegant set of gorgeous dress form cards was calling out to me. 
I added a bit of crochet trim under the mat layer.  Of course, I again had to use some of the relief paper to create that pretty rosebud heart button with my Epiphany Button Heart 20 tool!

Some detail for you: 
Ingredients:
CRD1478 - Bella Fiori - Rosie Scripts Beige Background Card
PCT1899 - Bella Fiori - Rosanna Delights Paper Craft Toppers
A4PRL24 - Pearl Blue Cardstock
Button Studio Tool Heart 20 - Epiphany Crafts
Button Studio Accessories Buttons Heart 20 (1) - Epiphany Crafts
Kraft Cardstock - The Paper Studio
Distress Ink - Ranger; in Walnut Stain and Weathered Wood
Foam Tape, Large Petal Rolling Tool - Imaginisce
Stick Pins - Michael's
Other:  Seam Binding Ribbon, Hemp, Trim, Sewing Machine and Thread

If you can't find Kanban Crafts products locally, The Big Craft Store has a wonderful selection for you to browse.

Thanks so much for popping on over today!  Have yourself a super scrappity day!!!
~ Rhonda

Wednesday, December 7, 2011

Brr! Winter has Arrived!

Happy Wednesday to all of my crafty friends!

I don't know what the weather is like where you are at, but baby it's COLD outside here in Minnesota!  The winter weather certainly hit home last night when it feels like about 9 degrees Fahrenheit. 

What's a gal to do with that winter inspiration?  I decided to make a few Kanban Crafts cards!  I am just in love with their quality papers, not to mention their absolutely beautiful designs!!! 

Check out this fun layered Christmas Card that I created.  I used some of the little snowflakes in the relief paper along with my Epiphany 14 Round tool and epoxies to create some snowflake embellishments!
Some details for you: 

Ingredients:
PCT1022 - Above the Rooftops

PCT1214 - English Riviera - With Love - Lilac (foil scallops)
Large Snowflake Punch - Martha Stewart
Small Snowflakes (2) - Spellbinders
Epiphany Crafts Shape Studios Tool Round 14
Epiphany Shape Studio Accessories - Bubble Caps Round 14 (3)
Cardstock - Bazzill
Distress Ink - Ranger; in Walnut Stain and Weathered Wood
Foam Tape - Imaginisce
Other:  Trim, Sewing Machine and Thread

If you don't know where you can find Kanban Crafts products, you can find them over at The Big Craft Store

Thanks so much for popping on over today!  Have yourself a super scrappity day!!!
~ Rhonda

Monday, December 5, 2011

Decking the Halls... Imaginisce Style!

Holiday Greetings to you my friends!

We are in the Holiday spirit at Imaginisce!!!  You know what they say about these things, it does become infectious so don't say I didn't warn you...  he he!

Today's Deck the Halls post over at Imaginisce is all about Christmas Card inspiration.  You all know how much I adore cardmaking!  I decided to create a fun easel card so I could display some Holiday spirit at work.  (For a wonderful easel card tutorial, from Beate Johns at SplitCoast Stampers click here!) 
A little detail image for you:
Designer Notes:
I've accented this card with a bit of bling using my i-Rock and some jewels.  Last year I found that gorgeous large acrylic snowflake from the Cottage Christmas collection by Imaginisce and it seemed like the perfect fit for this card. 

Mr. Snowbird was trimmed out from one of the "Santa's Little Helper" sticker stackers.

To create the "door stop" part of my easel card, I simply attached the sentiment die cut with some of the foam tape by Imaginisce.  It worked perfectly!

Ingredients:
Kraft Cardstock, The Paper Company
Blue Cardstock, Bazzill
Christmas Magic (003360) - “Santa’s Littler Helper” by Imaginisce
Peppermint Stick (003357) - “Santa’s Littler Helper” by Imaginisce
Die-Cuts (003371) - “Santa’s Littler Helper” by Imaginisce
Sticker Stackers (003368) - “Santa’s Littler Helper” by Imaginisce
i-Rock (002260) by Imaginisce
Hot Rock Compacts in Jewel (002269) and Crystal (002267) by Imaginisce
Large Acrylic Snowflake, “Cottage Christmas Acrylic Snowflakes”, Imaginisce
2 Small Acrylic Snowflakes, Dress it Up
Foam Tape, Imaginisce
Glue Glider Pro – Perma Tac, Glue Arts
Raisn’s – Glue Arts
Fired Brick, Weathered Wood and Walnut Stain Distress Inks by Ranger
Martha Stewart Score Board
Other: Double Sided Tape, Seam Binding Ribbon, Sewing Machine and Thread

Thanks so much for stopping on over today!  Be sure you visit the Imaginisce blog to see what the other fabulous designers have created as well!!!

Have a super scrappity day!
~ Rhonda

Friday, December 2, 2011

Deck the Halls!

Make sure you mark your calendar and stop on over to the Imaginisce Blog next week for some fabulous Christmas inspiration!!! 

You do not want to miss this!

Have a super scrappity day!
~ Rhonda

Thursday, December 1, 2011

Happy December!

Greetings to you on this fabulous first day of December!

I'm very excited for today's post because it is a fun challenge over at Imaginisce!!!  Cari found the most amazing color palette and asked us to create using this as our inspiration:
Coincidentally one of the teachers at our Preschool asked me the other morning if I would have any use for this willow Christmas tree she had.  I took one look at it and thought --- perfect for something fun! 

Want to see what I did with all of this inspiration?  Our kids are young yet and the oldest absolutely loves candy and treats.  I decided that an Advent Tree would be easier for us to manage for the boys right now.  I used the adorable "Santa's Little Helper" line to coordinate with the color scheme:
To give you some context of the scale, this tree is over 2.5 feet high!

Here are a few pictures with the lights on.  Hopefully it gives you an idea of the effect.  Every day starting today, the boys will pull a tag counting down until Christmas day.  I will get them their treat and we will put their tag into a jar.  : ) 

Techniques used:
  • Cut 6 pockets from 4 different card stocks for a total of 24 pockets using a Provocraft pocket die
  • Punch 24 tags from the "Santa's Little Helper" papers by Imaginisce using Marvy Uchida punch
  • Decorate pockets using Chipboard elements and Sticker Stackers from "Santa's Little Helper"
  • Cut apart the Sticker Stackers dimensional decorations so the scale works to the pockets.
  • Use a variety of trims including baker's twine, hemp, seam binding ribbon and ric-rak for added texture.
  • To create the star; Cut two stars using the largest Spellbinder Star Die, then score them to create dimension.  Carefully glue together using a coffee stir stick for the stem.
Tips:
  • If you happen to find one of these trees, you will definitely want to use our i-rock LED lighted tweezers like I did to help you thread your trims through and tie. 
Thanks so much for stopping on over today!  Make sure you stop on over to the Imaginisce blog for even more amazing inspiration from the rest of our uber talented Design Team gals!  We really hope you'll play along with us for the last challenge of 2011! 

Have a super scrappity day!
~ Rhonda